Getting MCP Server Working with Claude Desktop in WSL
In this post, I’ll go through the process of getting a Model Context Protocol (MCP) tool up and running with the Claude desktop app using Node in Windows Subsystem for Linux (WSL).
Using WSL allows me to manage my Node versions on WSL without cluttering my Windows environment, also, Node on Windows is a ballache. This means if I create a MCP tool (using Cline) and I want to use it in the Claude desktop app I can!
Tl;DR: Skip to Configure Claude Desktop for how to configure.
Setting Up the MCP Server
To get started, I created a simple word counter tool (with Cline) that I could validate both in the client and within the Claude desktop app.
So, using the Cline extension it was “create a simple word counter tool”, Cline went off and did it’s thing!
It (Cline) set up the directory for the MCP server in WSL, something along the lines of:
mkdir -p ~/Documents/Cline/MCP/word-counter
cd ~/Documents/Cline/MCP/word-counter
npm init -y
npm install @modelcontextprotocol/sdk typescript @types/node
This isn’t really important, Cline wrote a simple TypeScript server that counts words in a given text string. I’m not going to go into the details as it’s just to validate it’s working in Cline first then I’ll try in the Claude desktop app. Cline built the tool and I could see it in the MCP Servers list.
Configure Claude Desktop
The crucial part was configuring the Claude desktop app to use the Node executable from WSL. I ran the following command in WSL to find the path to Node:
which nodeThis returned a path like /home/scott/.nvm/versions/node/v20.12.1/bin/node.
This is what’s needed to go into the claude_desktop_config.json file.
You can open the file explorer in that location on your Windows
machine with the run command (Windows Key+r) and then adding %userprofile%\AppData\Roaming\Claude and pressing enter.
Create the file if it doesn’t exist.
Update the Claude desktop configuration file located (for me) at C:\Users\scott\AppData\Roaming\Claude\claude_desktop_config.json to
include the new MCP server:
{
	"mcpServers": {
		"word-counter": {
			"command": "wsl.exe",
			"args": [
				"bash",
				"-c",
				"/home/scott/.nvm/versions/node/v20.12.1/bin/node /home/scott/Documents/Cline/MCP/word-counter/build/index.js"
			]
		}
	}
}
This is the important part, the command is wsl.exe and the args are the path to the Node executable and the MCP server, that’s in two
parts, the first is the node binary the second is the path to the MCP
server.
Passing Environment Variables
If your MCP tool requires environment variables, you can pass them
directly in the command line arguments instead of using the env property in the configuration. I do it this way because the Claude
desktop app was throwing an error when I tried to set environment
variables in the env section.
Here’s an example config that uses an environment variable:
{
	"mcpServers": {
		"tool-with-env-vars": {
			"command": "wsl.exe",
			"args": [
				"bash",
				"-c",
				"MY_API_KEY=generated_key_goes_here /home/scott/.nvm/versions/node/v20.12.1/bin/node /home/scott/Documents/Cline/MCP/tool-with-env-vars/build/index.js"
			]
		}
	}
}
In this configuration, the MY_API_KEY is set directly in the command
string before calling the Node executable. This way, the environment
variable is available when it runs.
Make sure to replace generated_key_goes_here with your actual API
key. This method ensures that your MCP tool can access the necessary
environment variables without causing errors in the Claude desktop
app.
Using a npm package
If you want to use one of the MCP servers it’s a similar process.
For example, to use the server-filesystem server, you can add the
following to your claude_desktop_config.json file:
{
	"mcpServers": {
		"filesystem": {
			"command": "wsl.exe",
			"args": [
				"bash",
				"-c",
				"npx -y @modelcontextprotocol/server-filesystem /home/scott/Documents/folder-allowed-access-to"
			]
		}
	}
}
This example was what I got working on a Linux instance that used Volta for the node version management. This was the simplest way!
I tried something similar with the sequential-thinking server on
another machine that used nvm instead and it was a bit more
involved!
{
	"sequential-thinking": {
		"command": "wsl.exe",
		"args": [
			"bash",
			"-c",
			"source ~/.nvm/nvm.sh && /home/scott/.nvm/versions/node/v20.12.1/bin/npx @modelcontextprotocol/server-sequential-thinking"
		]
	}
}
The key difference is that with nvm, I needed to source the nvm
environment first with source ~/.nvm/nvm.sh to ensure the Node
environment is properly set up.
Similar if you want to use pnpm dlx:
{
	"sequential-thinking": {
		"command": "wsl.exe",
		"args": [
			"bash",
			"-c",
			"source ~/.nvm/nvm.sh && /home/scott/.local/share/pnpm/pnpm dlx @modelcontextprotocol/server-sequential-thinking"
		]
	}
}
Fiddly but it works! No need to install Node in Windows!
Testing the Setup
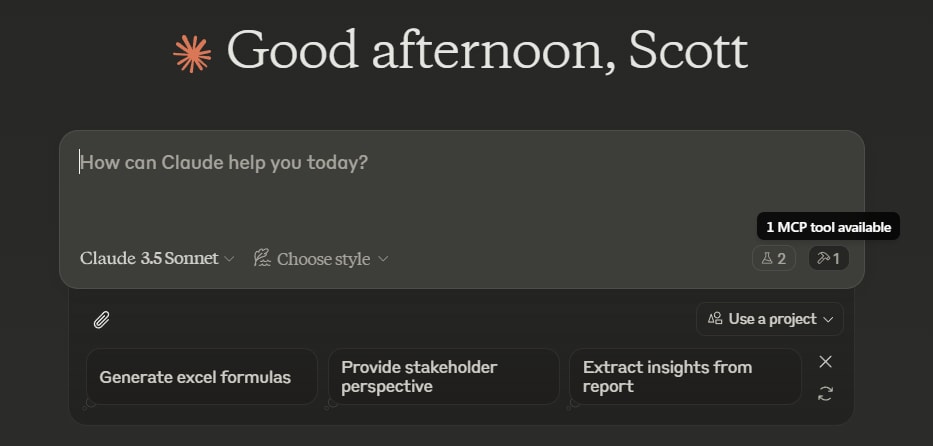
After updating the configuration, I restarted the Claude desktop app to load the new settings.
There will be a new icon to indicate that there’s a new MCP tool to use!
Clicking on the icon will show the tool details.
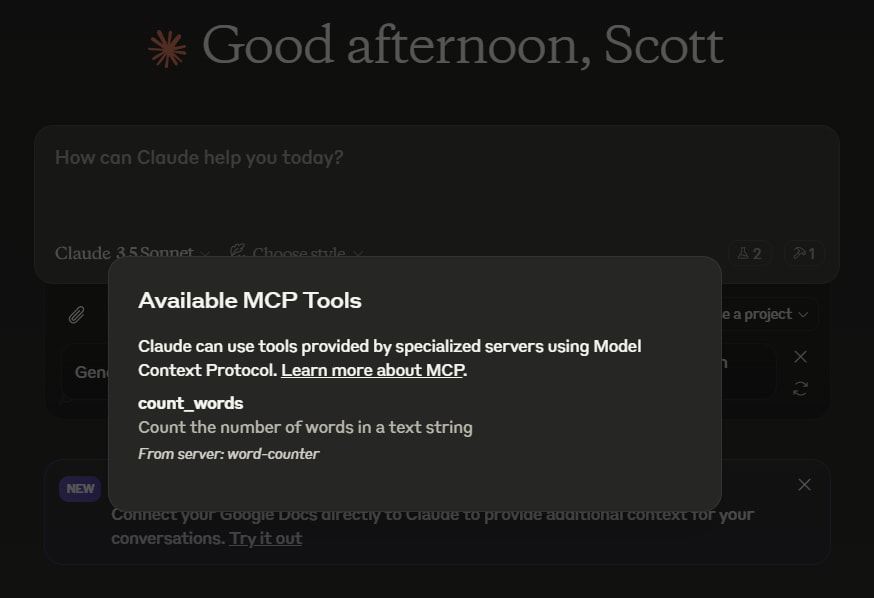
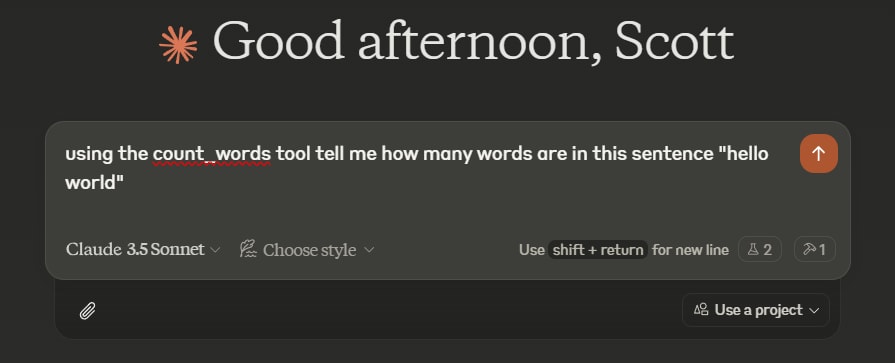
I tested the word counter tool by asking Claude to count words in a sample text.
I’m then prompted to allow the use of the tool by Claude.
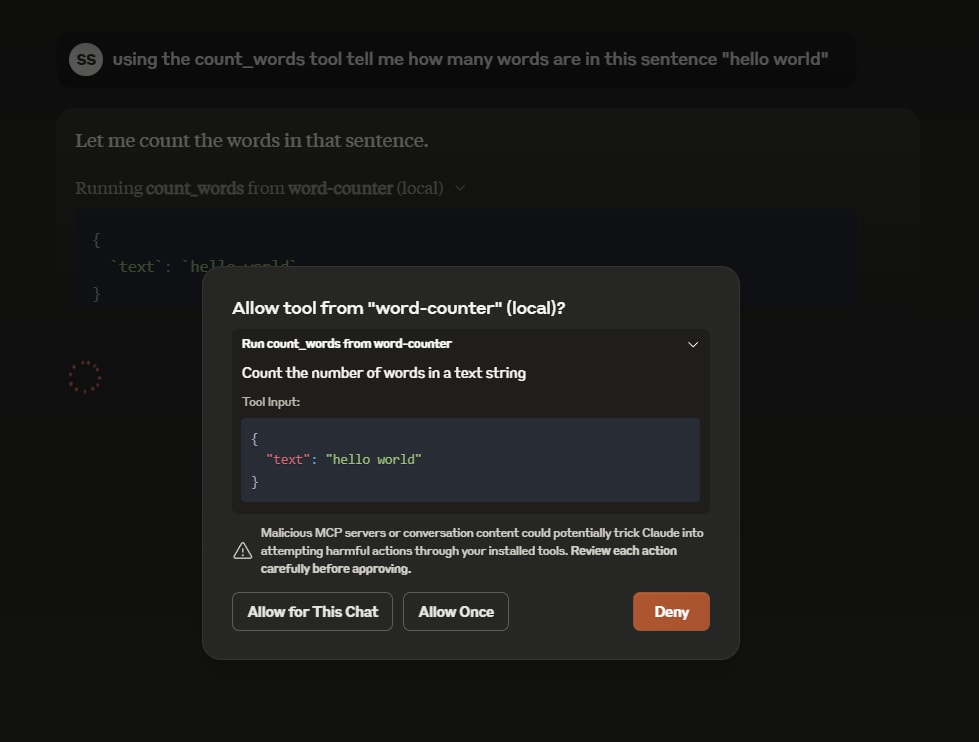
Allow for this chat clicked and the tool returned the correct word count, confirming that everything was working as expected.
Conclusion
It’s totally possible to use WSL for your MCP tools in Windows with no need to install Node in Windows! By using WSL, I was able to set up an MCP server for the Claude desktop app with a little config!
If you’re a WSL user looking to integrate tools with the Claude desktop app, I hope this guide helps you get started!
There's a reactions leaderboard you can check out too.